ExpansionTile is available in a material design system where you have a tile. When you tap on the tile a detailed content section will be expanded at the bottom of that tile. Flutter also allows us to create this expansion tile in our apps for each platform (web, android, ios, android).
Today you will create ExpansionTile by using three different methods in Flutter.
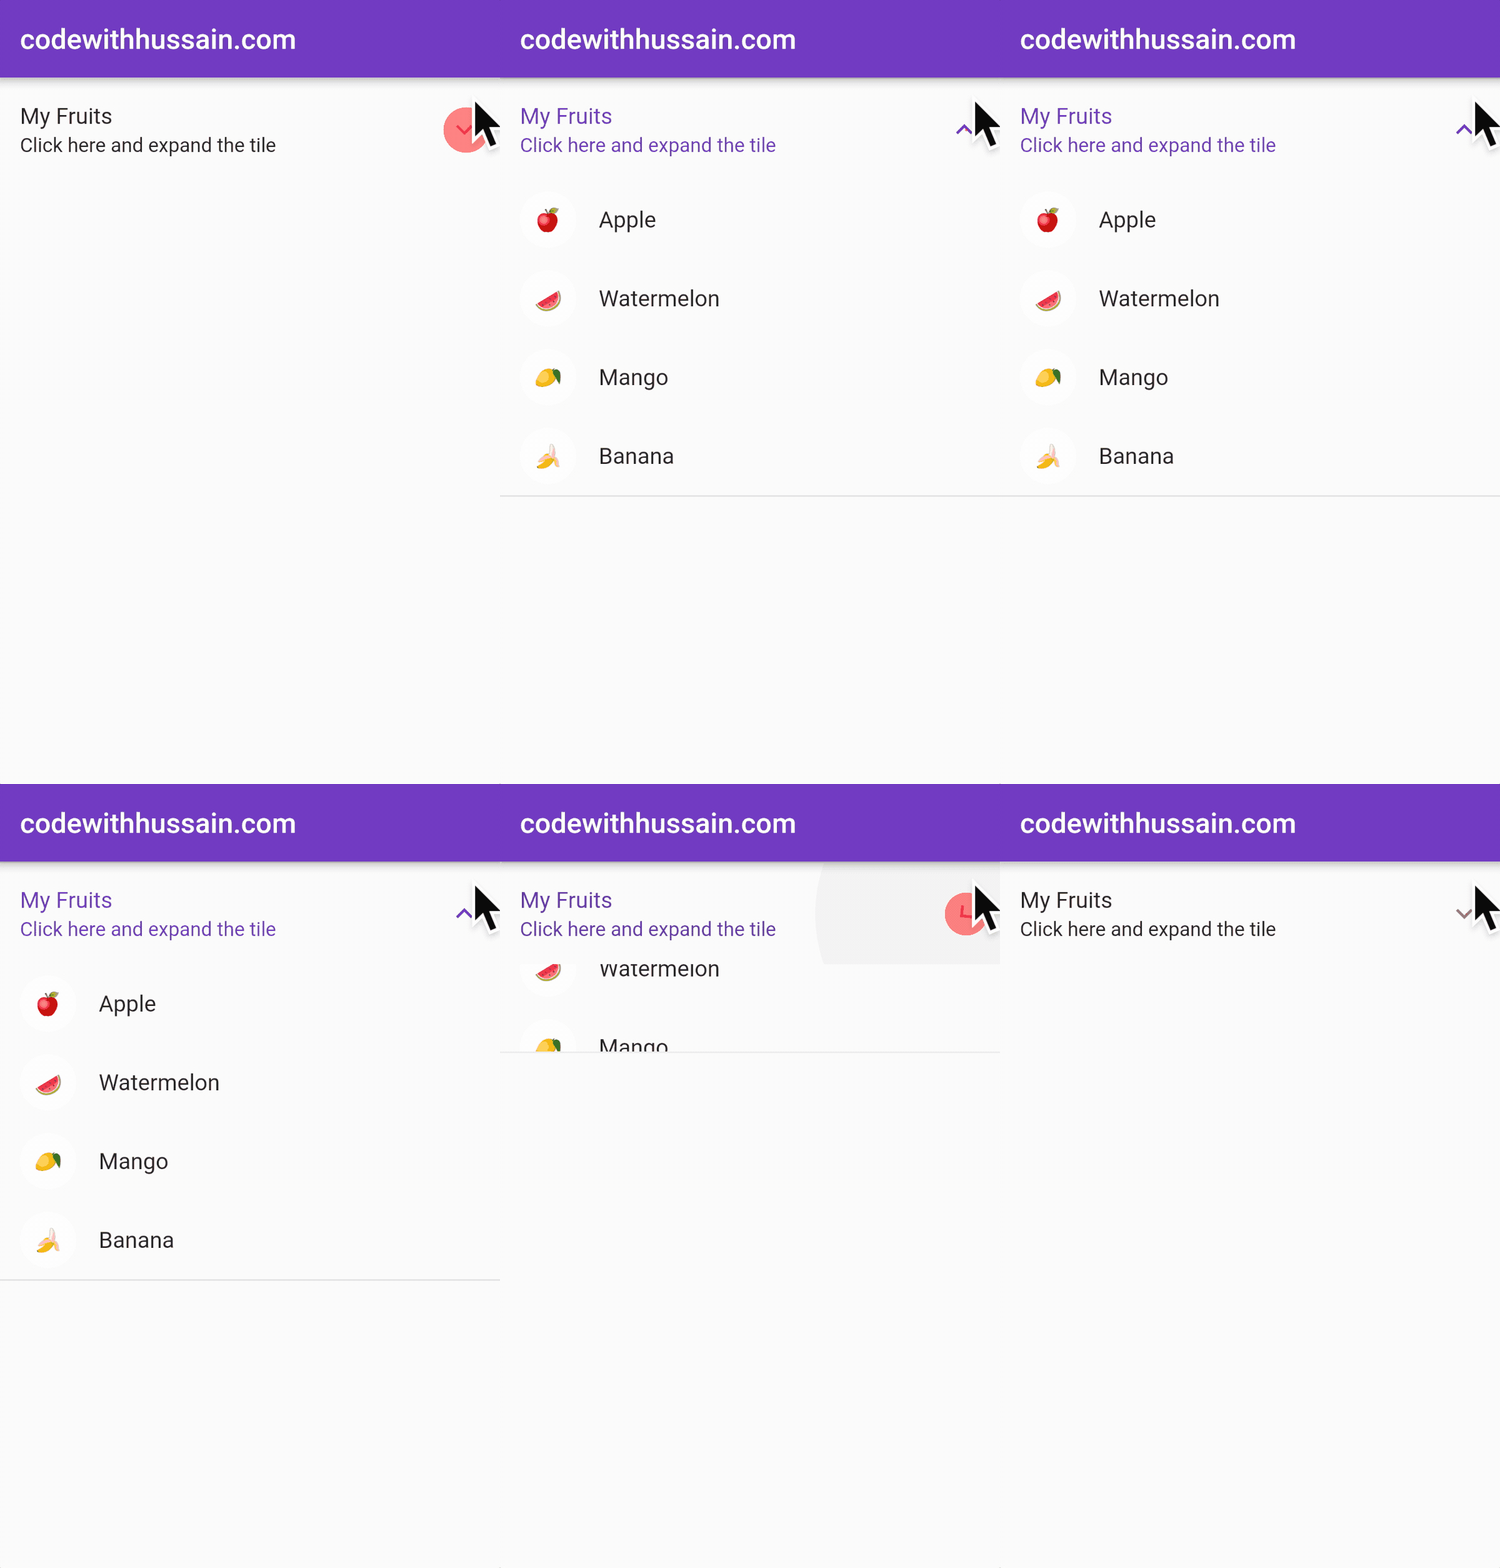
Method #1: Simple Expansion Tile
Preview:
Final Code:
import 'package:flutter/material.dart';

void main() {
  runApp(const MyApp());
}

class MyApp extends StatelessWidget {
  const MyApp({Key? key}) : super(key: key);

  @override
  Widget build(BuildContext context) {
    return MaterialApp(
      theme: ThemeData(primarySwatch: Colors.deepPurple),
      debugShowCheckedModeBanner: false,
      home: const MyExpansionTile(),
    );
  }
}

class MyExpansionTile extends StatelessWidget {
  const MyExpansionTile({Key? key}) : super(key: key);

  @override
  Widget build(BuildContext context) {
    return Scaffold(
      appBar: AppBar(
        title: const Text('codewithhussain.com'),
      ),
      //Check EpansionTile Implementation
      body: const ExpansionTile(
        title: Text('My Fruits'),
        subtitle: Text('Click here and expand the tile'),
        children: [
          ListTile(
              leading: CircleAvatar(
                child: Text('🍎'),
                backgroundColor: Colors.white,
              ),
              title: Text('Apple')),
          ListTile(
              leading: CircleAvatar(
                child: Text('🍉'),
                backgroundColor: Colors.white,
              ),
              title: Text('Watermelon')),
          ListTile(
              leading: CircleAvatar(
                child: Text('🥭'),
                backgroundColor: Colors.white,
              ),
              title: Text('Mango')),
          ListTile(
              leading: CircleAvatar(
                child: Text('🍌'),
                backgroundColor: Colors.white,
              ),
              title: Text('Banana')),
        ],
      ),
    );
  }
}
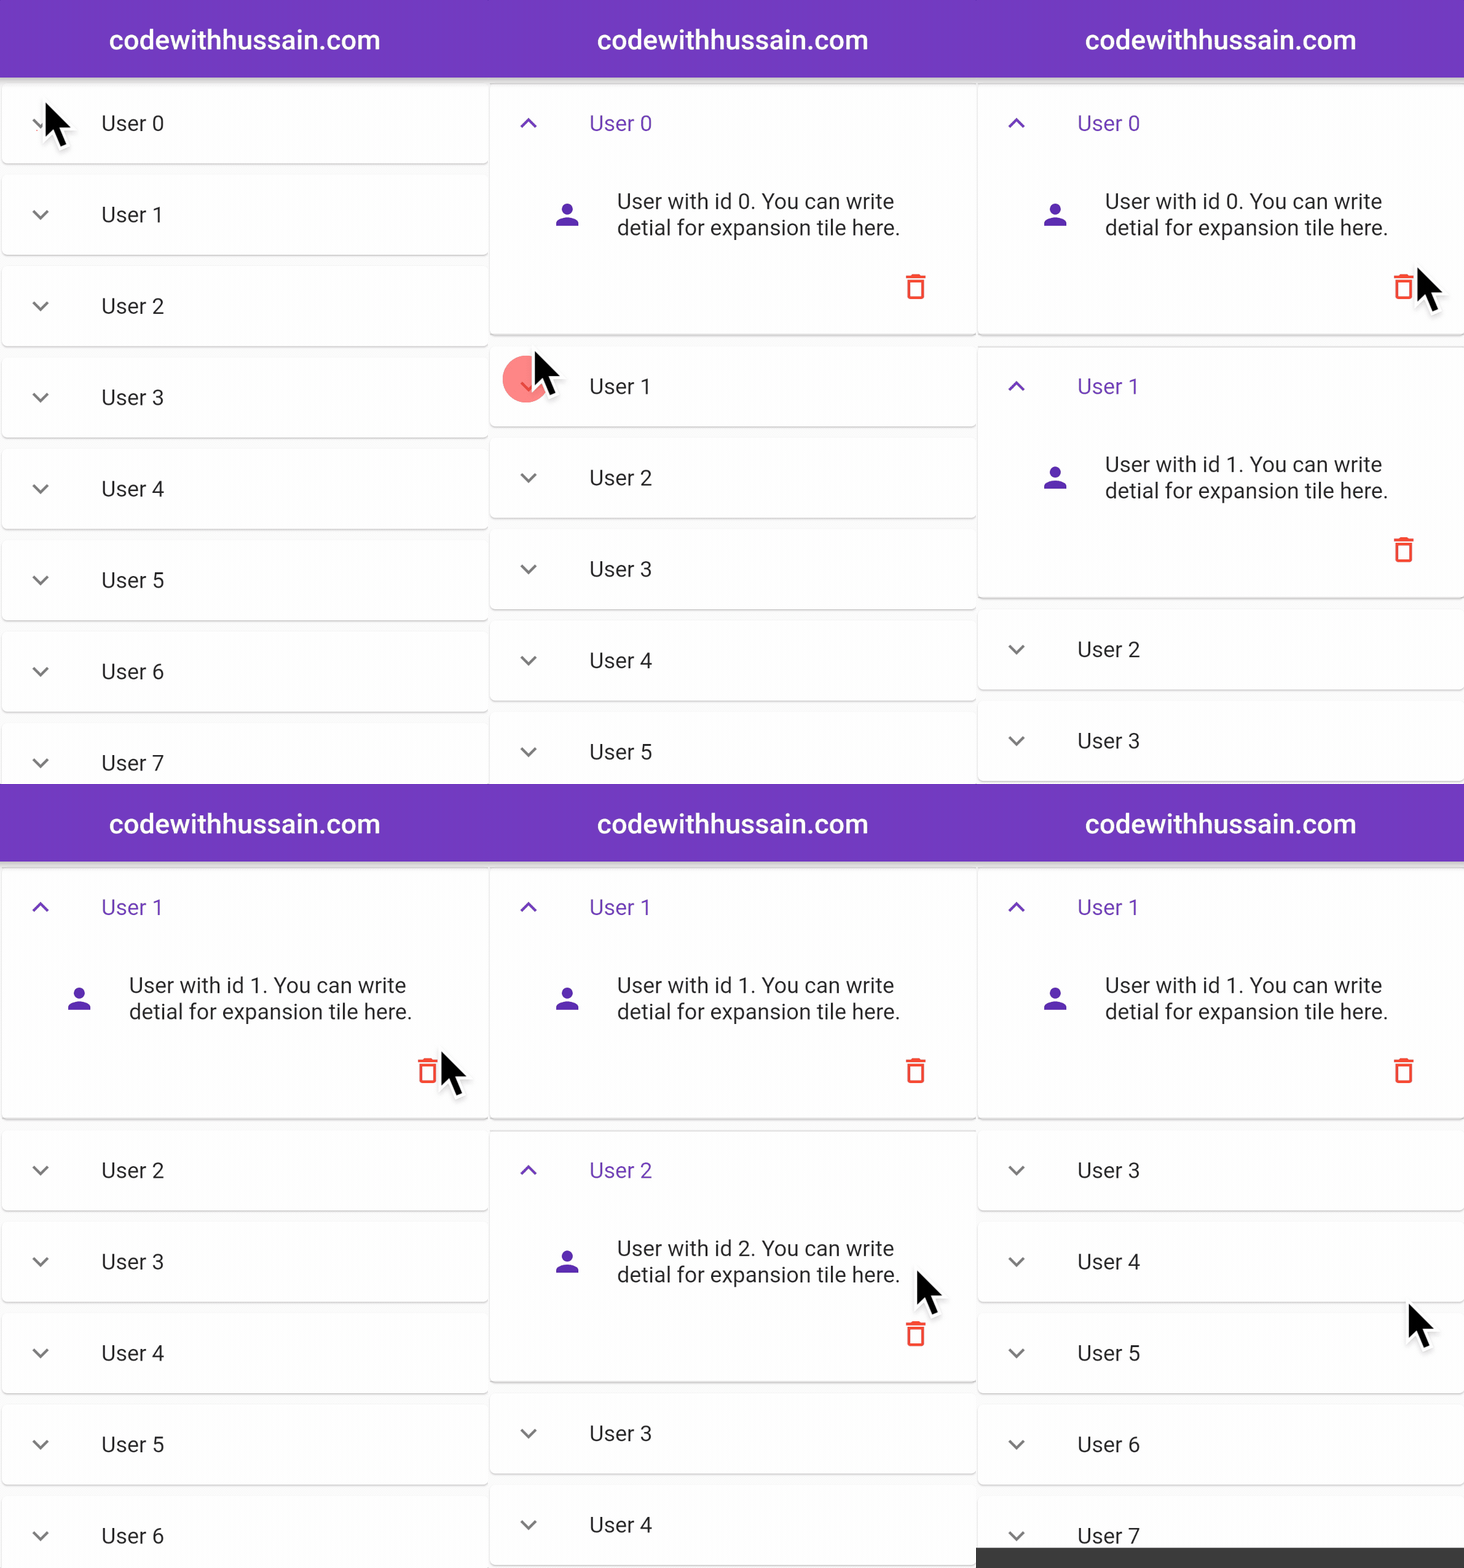
Method #2: Expansion Tile inside the ListView.builder()
Preview:
Here you use PageStorageKey for maintaining the state of the ExpansionTile.
key: PageStorageKey(/*Any unique value*/),
Code:
import 'package:flutter/material.dart';

void main() {
  runApp(const MyApp());
}

class MyApp extends StatelessWidget {
  const MyApp({Key? key}) : super(key: key);

  @override
  Widget build(BuildContext context) {
    return MaterialApp(
      theme: ThemeData(primarySwatch: Colors.deepPurple),
      debugShowCheckedModeBanner: false,
      home: const MyExpansionTile(),
    );
  }
}

class MyExpansionTile extends StatefulWidget {
  const MyExpansionTile({Key? key}) : super(key: key);

  @override
  State<MyExpansionTile> createState() => _MyExpansionTileState();
}

class _MyExpansionTileState extends State<MyExpansionTile> {
  // Generate a list of Users, You often use API or database for creation of this list
  final List<Map<String, dynamic>> _users = List.generate(
      20,
      (index) => {
            "id": index,
            "name": "User $index",
            "detail":
                "User with id $index. You can write detial for expansion tile here."
          });

  //Function use to delete the user from the list
  void _deleteUser(int id) {
    setState(() {
      _users.removeWhere((element) => element['id'] == id);
    });
    ScaffoldMessenger.of(context).showSnackBar(SnackBar(
        duration: const Duration(milliseconds: 600),
        content: Text('User with id $id has been deleted')));
  }

  @override
  Widget build(BuildContext context) {
    return Scaffold(
      appBar: AppBar(
        centerTitle: true,
        title: const Text('codewithhussain.com'),
      ),
      body: ListView.builder(
        itemCount: _users.length,
        itemBuilder: (_, index) {
          final item = _users[index];
          return Card(
            //Remember
            //Here key is required to save and restore ExpansionTile expanded state
            key: PageStorageKey(item['id']),

            child: ExpansionTile(
              controlAffinity: ListTileControlAffinity.leading,
              childrenPadding:
                  const EdgeInsets.symmetric(vertical: 10, horizontal: 20),
              expandedCrossAxisAlignment: CrossAxisAlignment.end,
              maintainState: true,
              title: Text(item['name']),
              // Expanded Contents
              children: [
                ListTile(
                    leading: const CircleAvatar(
                      child: Icon(Icons.person),
                      backgroundColor: Colors.white,
                    ),
                    title: Text(item['detail'])),

                //Delete Button
                IconButton(
                  onPressed: () => _deleteUser(item['id']),
                  icon: const Icon(Icons.delete_outline),
                  color: Colors.red,
                ),
              ],
            ),
          );
        },
      ),
    );
  }
}
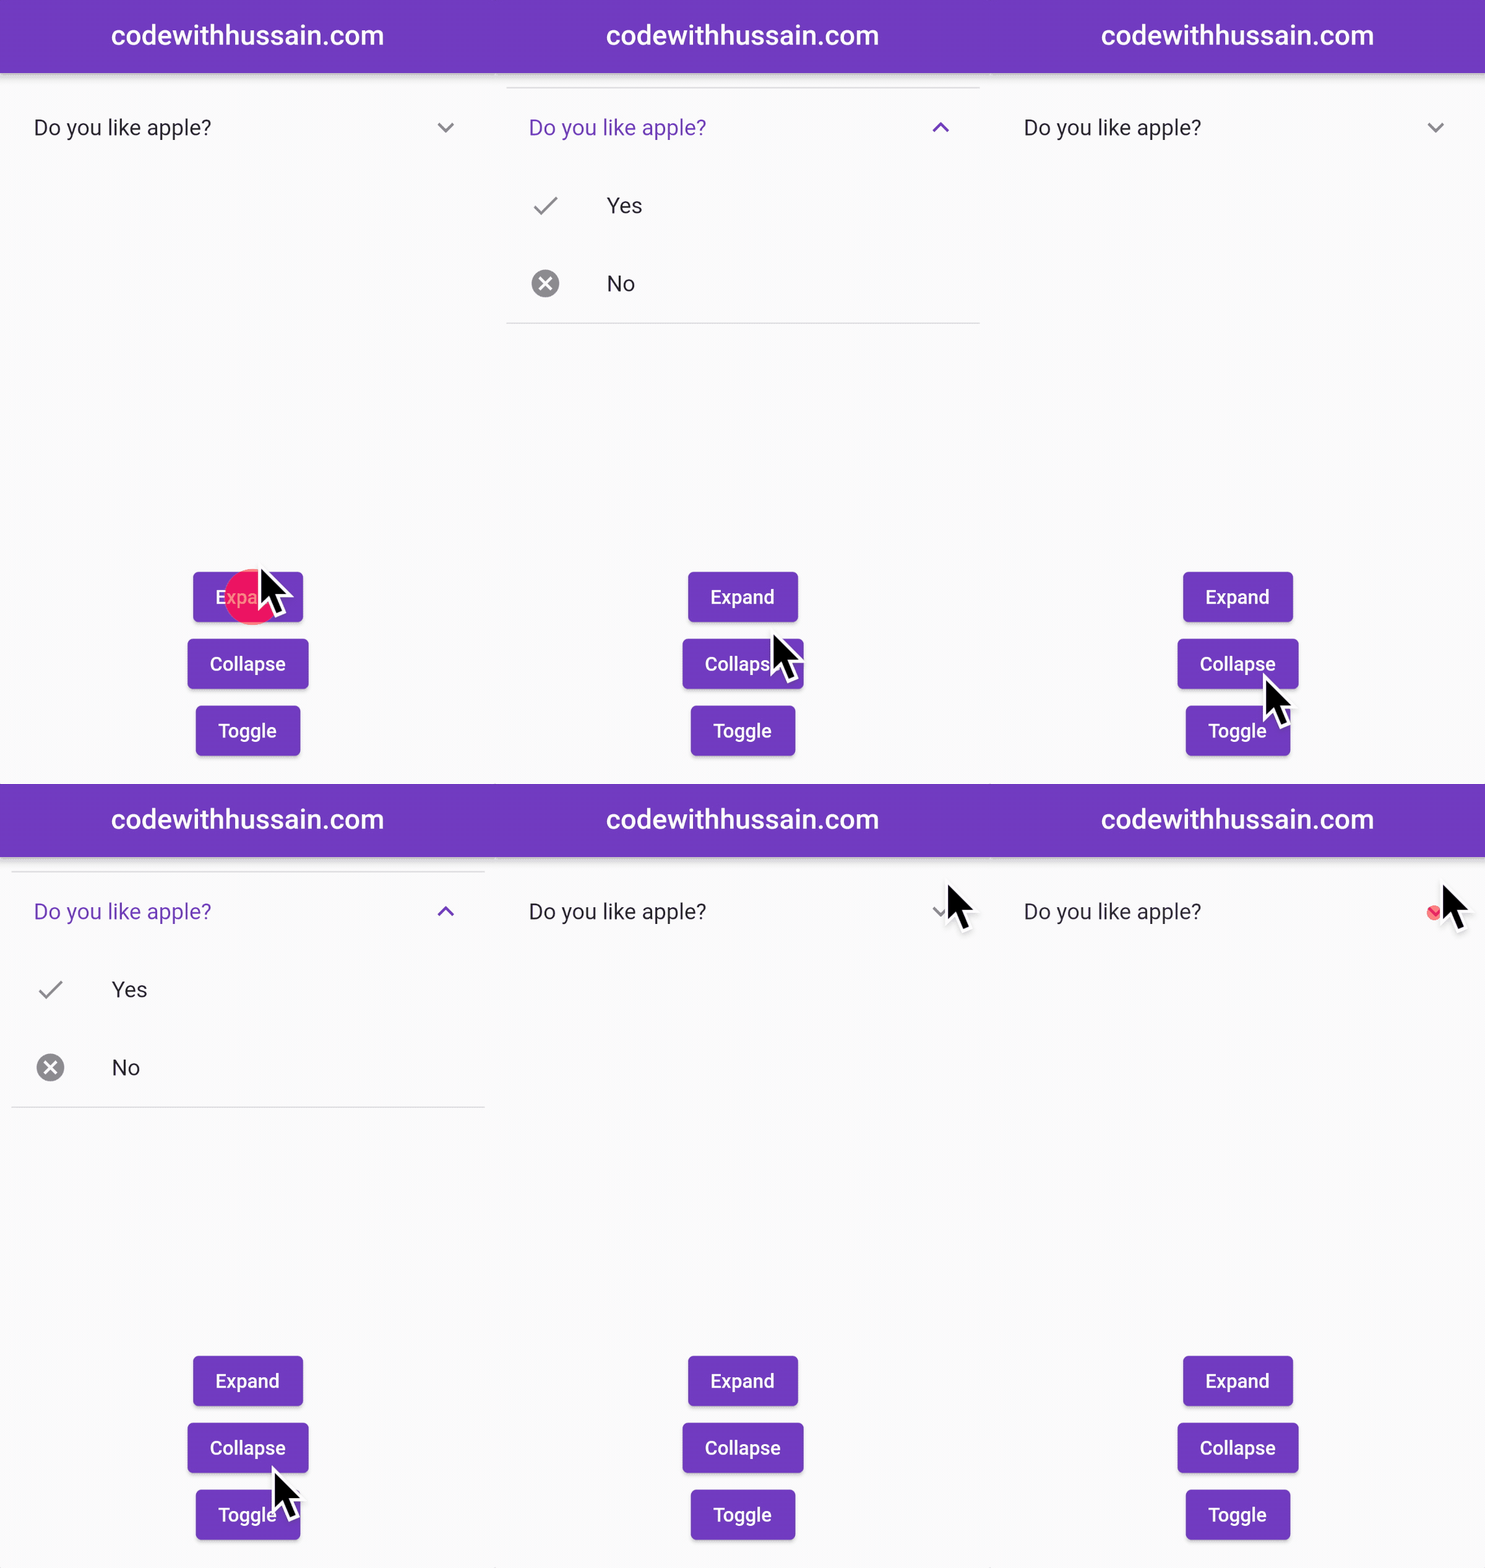
Method #3: Advance Expansion Tile
Preview:
Here you will use Flutter advance_expansion_tile package for adding ExpansionTile to your app.
You can manage the state of the Expansion tile programmatically by using buttons outside the ExpansionTile widget.
For that you will use expand() collapse() and toggle() methods.
Code:
dependencies:
  advance_expansion_tile: ^1.0.1
import 'package:flutter/material.dart';
import 'package:advance_expansion_tile/advance_expansion_tile.dart';

void main() {
  runApp(const MyApp());
}

class MyApp extends StatelessWidget {
  const MyApp({Key? key}) : super(key: key);

  @override
  Widget build(BuildContext context) {
    return MaterialApp(
      theme: ThemeData(primarySwatch: Colors.deepPurple),
      debugShowCheckedModeBanner: false,
      home: const MyAdvanceExpansionTile(),
    );
  }
}

class MyAdvanceExpansionTile extends StatefulWidget {
  const MyAdvanceExpansionTile({Key? key}) : super(key: key);

  @override
  State<MyAdvanceExpansionTile> createState() => _MyAdvanceExpansionTileState();
}

class _MyAdvanceExpansionTileState extends State<MyAdvanceExpansionTile> {
  ///You use GlobalKey to manually collapse, exapnd or toggle Expansion tile
  final GlobalKey<AdvanceExpansionTileState> _globalKey = GlobalKey();

  @override
  Widget build(BuildContext context) {
    return Scaffold(
      appBar: AppBar(
        centerTitle: true,
        title: const Text('codewithhussain.com'),
      ),
      body: Column(
        children: [
          Padding(
            padding: const EdgeInsets.all(10.0),
            child: AdvanceExpansionTile(
              key: _globalKey,
              title: const Text('Do you like apple?'),
              children: const [
                ListTile(
                  leading: Icon(Icons.done),
                  title: Text('Yes'),
                ),
                ListTile(
                  leading: Icon(Icons.cancel),
                  title: Text('No'),
                ),
              ],
              onTap: () {},
            ),
          ),
        ],
      ),
      floatingActionButtonLocation: FloatingActionButtonLocation.centerFloat,
      floatingActionButton: Column(
        mainAxisAlignment: MainAxisAlignment.end,
        children: [
          ElevatedButton(
            onPressed: () {
              ///Expand Expansion tile
              _globalKey.currentState?.expand();
            },
            child: const Text('Expand'),
          ),
          ElevatedButton(
            onPressed: () {
              ///Collapse Expansion tile
              _globalKey.currentState?.collapse();
            },
            child: const Text('Collapse'),
          ),
          ElevatedButton(
            onPressed: () {
              ///Toggle Expansion tile
              _globalKey.currentState?.toggle();
            },
            child: const Text('Toggle'),
          ),
        ],
      ),
    );
  }
}
